本文介绍在银河麒麟 V11 Server 版上安装系统运行环境的完整步骤,包括 JDK 1.8、东方通 TongWeb、TiDB 和 Nginx。请先完成系统安装和磁盘挂载(参见 [麒麟 V11 Server 版安装教程](/2026/05/11/麒麟 V11 Server 版安装教程))。
1. 创建安装目录
如果已挂载独立数据盘,使用 /data 路径;否则使用 /opt 路径。以下以 /data 为例。
1
2
3
| mkdir -p /data/install
mkdir -p /data/software
cd /data/install
|
2. 上传安装包
将以下安装包上传至 /data/install 目录:
| 软件 |
文件名示例 |
说明 |
| JDK 1.8 |
jdk-8u281-linux-aarch64.tar.gz 或 jdk-8u281-linux-x64.tar.gz |
根据 CPU 架构选择 arm64 或 x64 版本 |
| 东方通 TongWeb |
TongWeb7.0.4.9_M10_Enterprise_Linux.tar.gz |
国产应用服务器,需提前获取授权和 license 文件 |
| TiDB |
在线安装 |
分布式 HTAP 数据库,PingCAP 出品 |
| Nginx |
在线安装 |
Web 服务器 / 反向代理 |
3. 确认系统架构
aarch64 → ARM 架构(如飞腾、鲲鹏处理器)x86_64 → x64 架构(如 Intel、AMD 处理器)
一、安装 JDK 1.8
1. 解压安装
1
2
| cd /data/install
tar -zxvf jdk-8u281-linux-x64.tar.gz -C /data/software/
|
2. 配置环境变量
写入以下内容:
1
2
3
4
| export JAVA_HOME=/data/software/jdk1.8.0_281
export JRE_HOME=$JAVA_HOME/jre
export CLASSPATH=.:$JAVA_HOME/lib/dt.jar:$JAVA_HOME/lib/tools.jar
export PATH=$JAVA_HOME/bin:$PATH
|
3. 生效并验证
1
2
| source /etc/profile
java -version
|
如果系统之前已安装 OpenJDK,需要替换默认 java:
1
2
3
4
| alternatives --install /usr/bin/java java /data/software/jdk1.8/bin/java 2000
alternatives --install /usr/bin/javac javac /data/software/jdk1.8/bin/javac 2000
alternatives --set java /data/software/jdk1.8/bin/java
alternatives --set javac /data/software/jdk1.8/bin/javac
|
在线安装 JDK 1.8(如系统源中有):
1
| yum install java-1.8.0-openjdk -y
|
二、安装东方通 TongWeb
1. 解压安装
TongWeb 7.0.4.9 为绿色压缩包,直接解压即可:
1
2
| cd /data/software
tar -zxvf TongWeb7.0.4.9_M10_Enterprise_Linux.tar.gz
|
解压后目录通常名为 TongWeb7.0.4.9_M10_Enterprise_Linux,为方便后续管理,可以建立软链接或重命名:
1
2
| cd /data/software
mv TongWeb7.0.4.9_M10_Enterprise_Linux tongweb
|
2. 安装 License
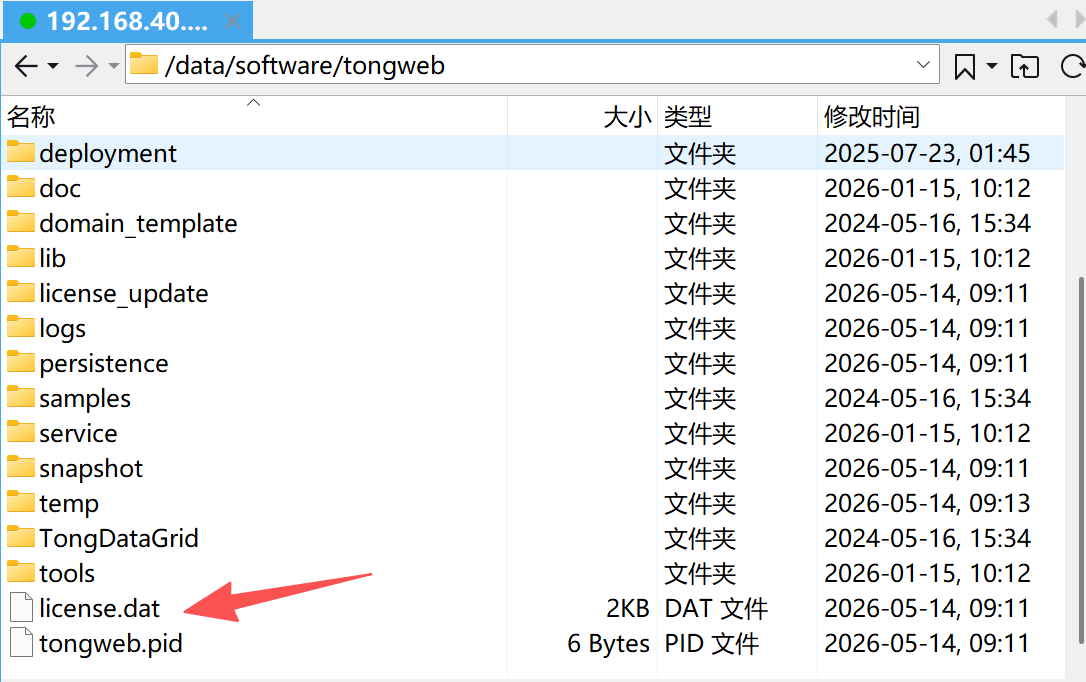
将官方提供的 license.dat 文件放置到 tongweb 跟目录下

3. 配置环境变量
在文件末尾追加:
1
2
| export TONGWEB_HOME=/data/software/tongweb
export PATH=$TONGWEB_HOME/bin:$PATH
|
生效配置:
4. 调整 JVM 参数(可选)
编辑 TongWeb 启动脚本,根据服务器实际内存调整 JVM 参数:
1
| vi $TONGWEB_HOME/bin/startserver.sh
|
找到 JAVA_OPTS 相关配置,建议设置:
1
| JAVA_OPTS="-Xms512m -Xmx2048m -XX:+UseG1GC"
|
生产环境建议 -Xmx 设置为服务器可用内存的 50%~70%。
5. 启动 TongWeb
1
2
| cd $TONGWEB_HOME/bin
./startserver.sh &
|
或使用 nohup 后台运行:
1
| nohup ./startserver.sh > tongweb.log 2>&1 &
|
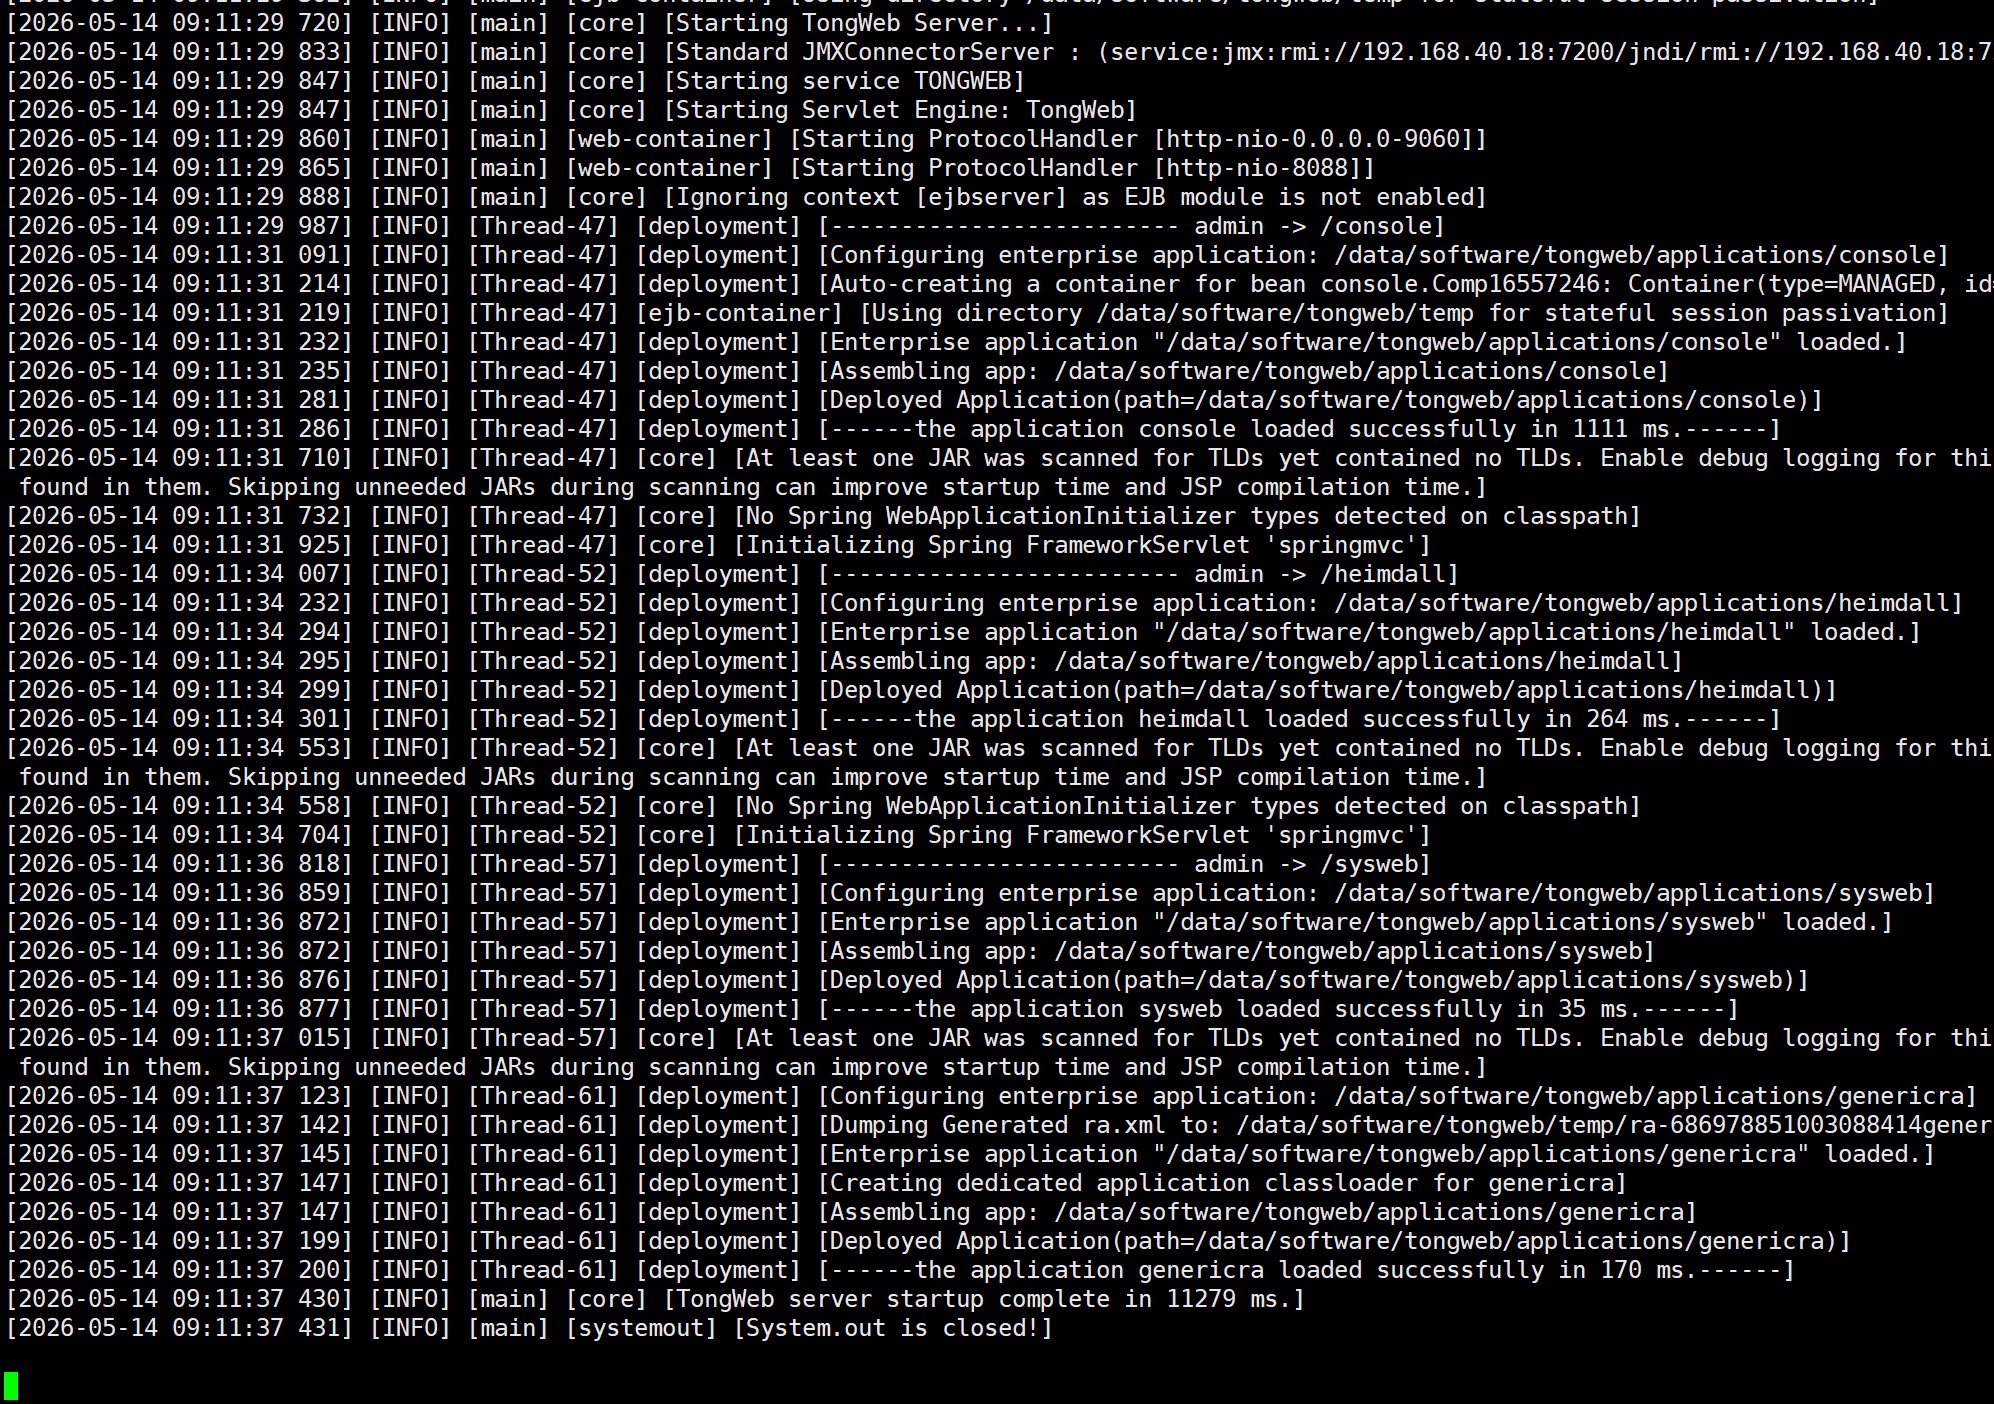
启动成功后,TongWeb 管理控制台默认地址:
1
| http://192.168.40.18:9060/console
|
可以看下文档安装包里的/data/software/tongweb/doc/TongWeb_doc.zip,了解更多管理功能和配置项。
默认管理端口为 9060,应用访问端口为 8088。首次登录使用安装时设置的账号密码或默认账号 thanos/thanos123.com。
首次登录,需要修改密码。用户名:thanos,密码:Thanos147.com
5.1 修改应用端口(可选)
TongWeb 默认应用访问端口为 8088,如需修改,编辑 conf/tongweb.xml:
1
| vi $TONGWEB_HOME/conf/tongweb.xml
|
找到 <http-listener> 节点,修改 port 属性(例如改为 8088):
1
2
3
4
5
|
<http-listener name="tong-http-listener" port="8088" .../>
<http-listener name="tong-http-listener" port="18080" .../>
|
将所有GBK编码的文件改为UTF-8编码,避免中文乱码问题一共5个:
1
2
3
4
5
6
7
8
| <web-container jsp-development="true" parameter-encoding="UTF-8" response-encoding="UTF-8" hung-thread-threshold="0" hostnameVerifier="NullHostnameVerifier">
<http-listener name="system-http-listener" port="9060" status="started" address="0.0.0.0" io-mode="nio" http2-enabled="false" ssl-enabled="false" redirect-port="443" uri-encoding="UTF-8" use-body-encoding-for-uri="false" max-parameter-count="10000" max-post-size="2097152" parse-body-methods="POST,PUT,DELETE" default-virtual-host="admin" create-time="2019-10-29 10:54:11">
<http-listener name="tong-http-listener" port="18080" io-mode="nio" redirect-port="8443" uri-encoding="UTF-8" parse-body-methods="POST" default-virtual-host="server" create-time="2019-10-29 10:54:11">
<http-listener name="ejb-server-listener" port="5100" status="stopped" io-mode="nio" http2-enabled="false" ssl-enabled="false" redirect-port="443" uri-encoding="UTF-8" use-body-encoding-for-uri="false" max-parameter-count="10000" max-post-size="2097152" max-swallow-size="2097152" parse-body-methods="POST" default-virtual-host="server" create-time="2019-10-29 10:54:12">
|
保存后重启 TongWeb 生效:
1
| systemctl restart tongweb
|
需要重新启动服务。
6. 配置开机自启
1
| vi /etc/systemd/system/tongweb.service
|
写入以下内容:
1
2
3
4
5
6
7
8
9
10
11
12
13
14
15
16
| [Unit]
Description=TongWeb Application Server
After=network.target
[Service]
Type=simple
User=root
Group=root
Environment=JAVA_HOME=/data/software/jdk1.8.0_281
ExecStart=/data/software/tongweb/bin/startserver.sh
ExecStop=/data/software/tongweb/bin/stopserver.sh
Restart=on-failure
RestartSec=10
[Install]
WantedBy=multi-user.target
|
启用并启动服务:
1
2
3
4
5
| systemctl daemon-reload
systemctl enable tongweb
systemctl start tongweb
systemctl restart tongweb
systemctl status tongweb
|
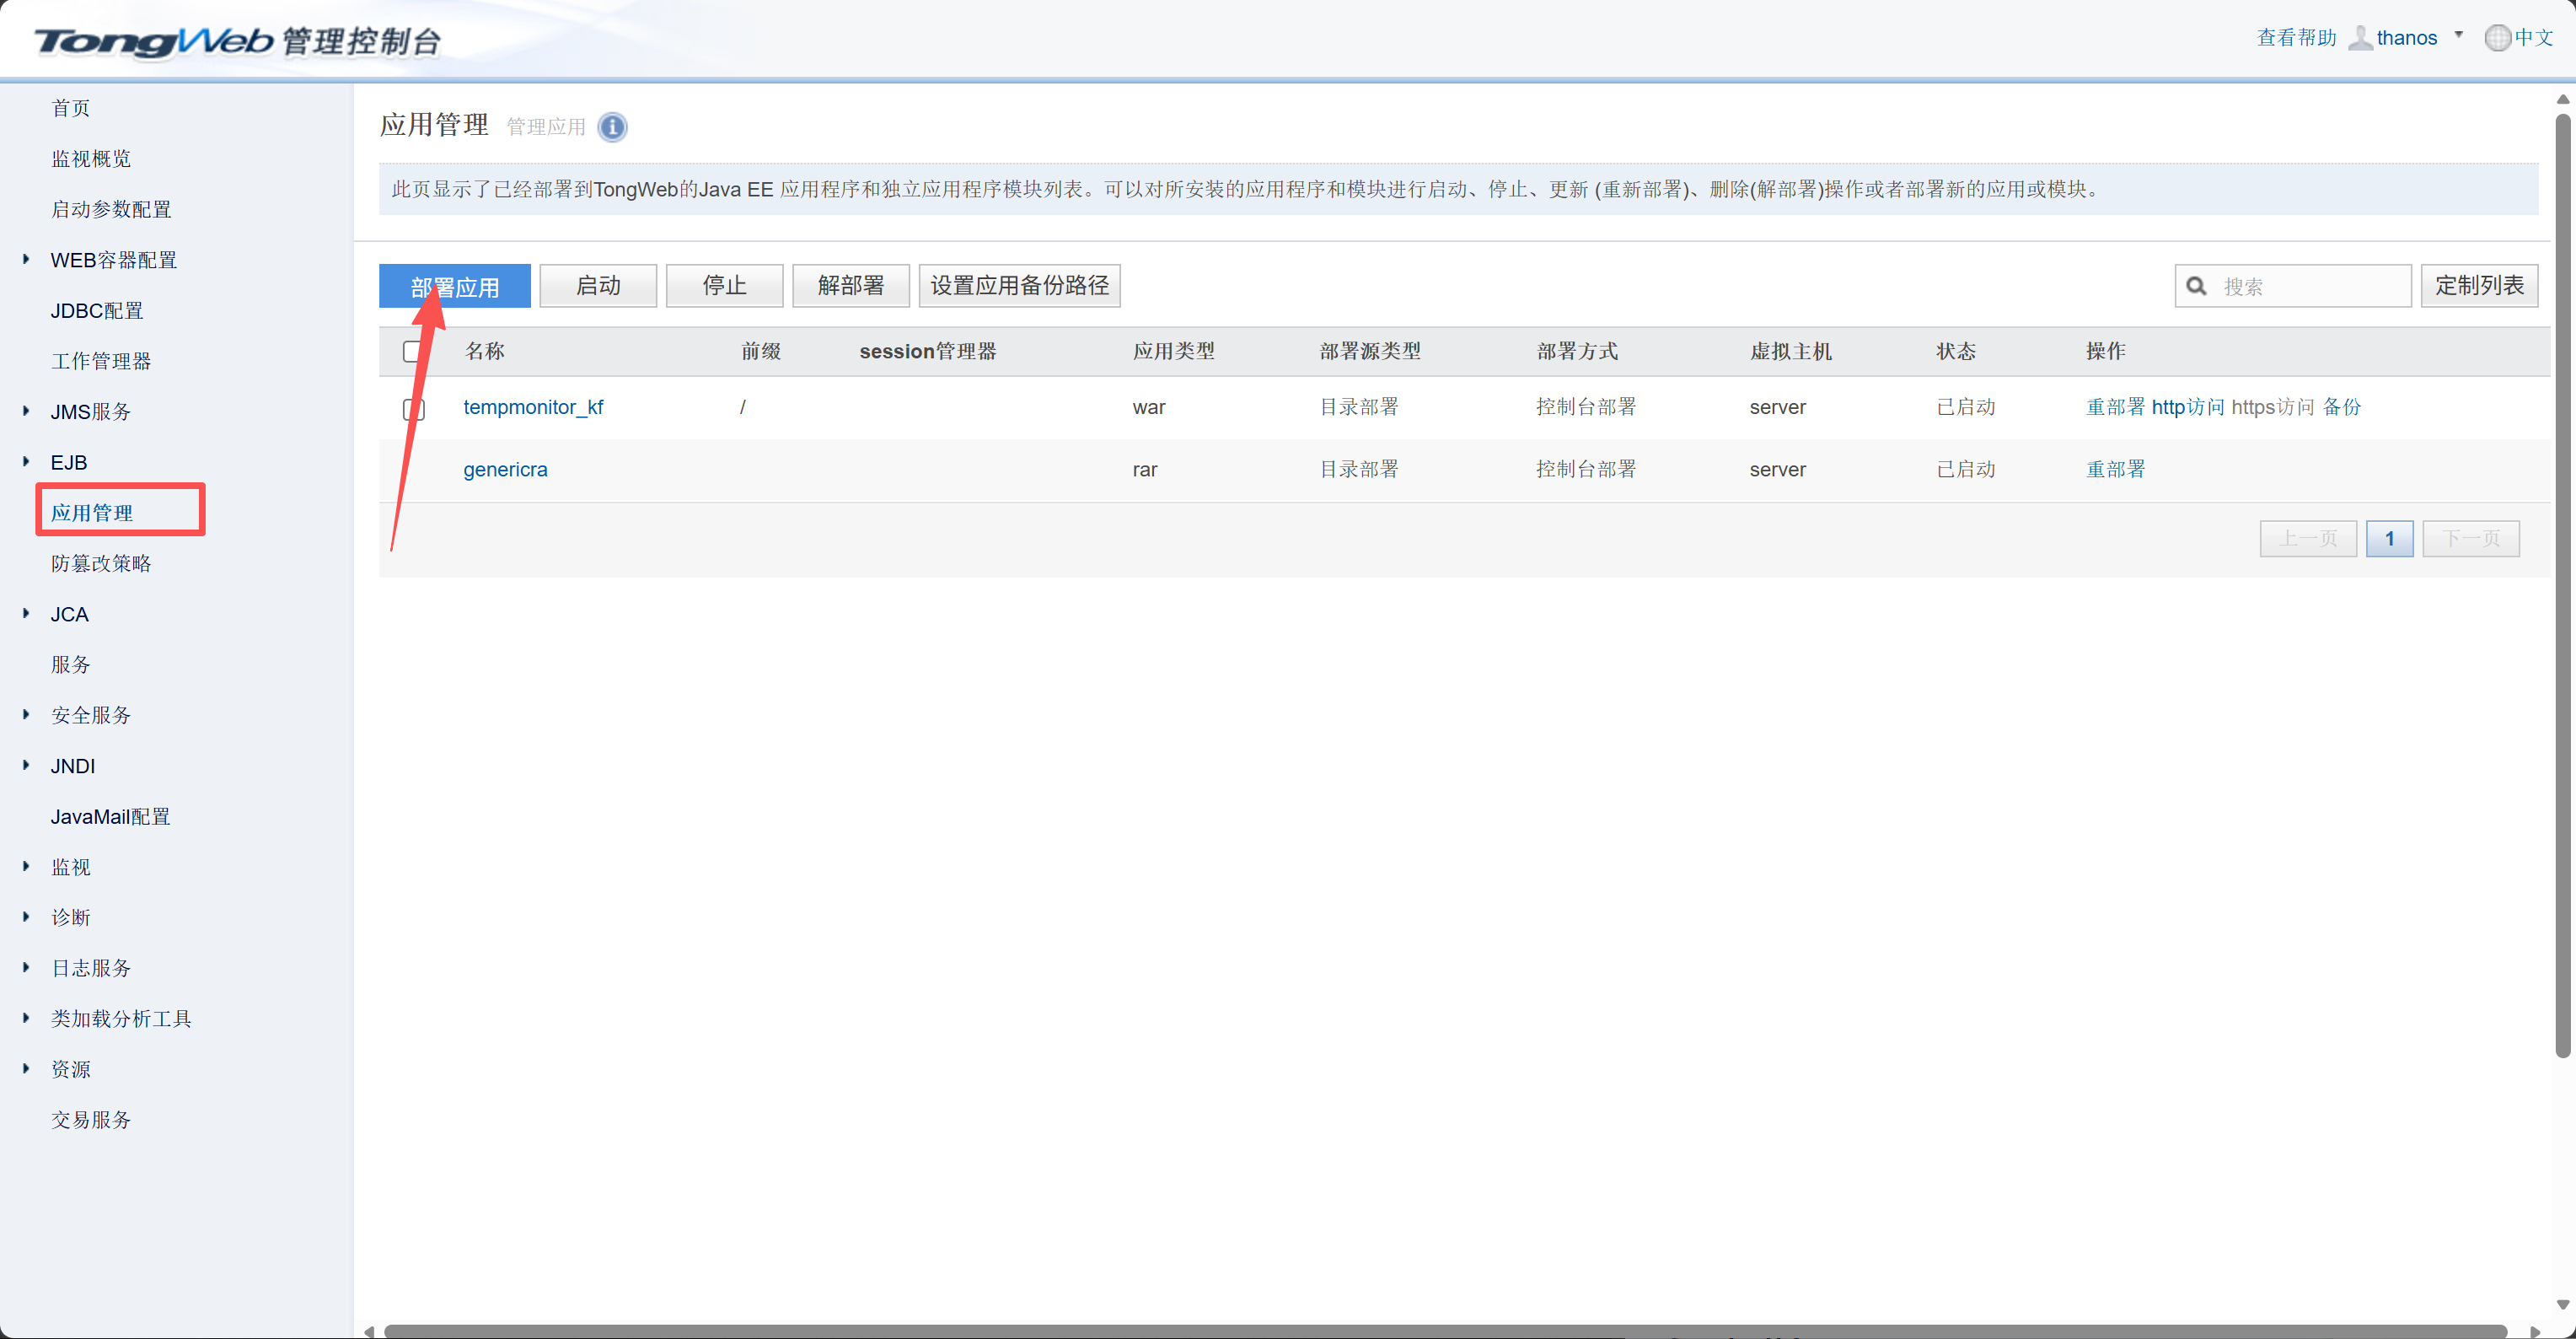
7. 部署应用
将应用 WAR 包上传到服务器,使用 TongWeb 管理控制台部署:
三、安装 TiDB
TiDB 是 PingCAP 开源的分布式 HTAP 数据库,兼容 MySQL 和 PostgreSQL 协议。推荐使用官方工具 TiUP 进行部署,支持单机测试和集群生产两种模式。
TiUP 部署
1. 安装 TiUP
1
2
| curl --proto '=https' --tlsv1.2 -sSf https://tiup-mirrors.pingcap.com/install.sh | sh
source ~/.bash_profile
|
2. 安装 TiDB 组件
首次运行会自动下载 cluster 组件及相关依赖。
3. 单机测试部署(开发/验证环境)
1
| tiup playground --host 0.0.0.0
|
默认会启动一个包含 TiDB、TiKV、PD、TiFlash 等组件的单机集群。TiDB 默认监听 4000 端口。
后台运行方式:
1
| tiup playground --host 0.0.0.0 --mode tikv-slim &
|
4. 集群生产部署
创建集群拓扑配置文件:
1
2
3
| cd /data
mkdir -p /data/install
vi /data/install/topology.yaml
|
单机精简版拓扑(开发/验证环境,不可用于生产):
1
2
3
4
5
6
7
8
9
10
11
12
13
14
| global:
user: "root"
ssh_port: 22
deploy_dir: "/data/software/tidb-deploy"
data_dir: "/data/software/tidb-data"
pd_servers:
- host: 192.168.40.18
tidb_servers:
- host: 192.168.40.18
tikv_servers:
- host: 192.168.40.18
|
单机生产版拓扑(推荐):
1
2
3
4
5
6
7
8
9
10
11
12
13
14
15
16
17
18
19
20
21
22
23
24
25
26
27
28
29
30
31
32
33
34
35
36
37
38
39
40
41
42
43
44
45
46
47
48
49
50
51
52
53
| global:
user: "root"
ssh_port: 22
deploy_dir: "/data/software/tidb-deploy"
data_dir: "/data/software/tidb-data"
monitored:
node_exporter_port: 9100
blackbox_exporter_port: 9115
server_configs:
tidb:
instance.tidb_slow_log_threshold: 300
tikv:
readpool.storage.use-unified-pool: false
readpool.coprocessor.use-unified-pool: true
pd:
replication.enable-placement-rules: true
replication.location-labels: ["host"]
pd_servers:
- host: 192.168.40.18
tidb_servers:
- host: 192.168.40.18
tikv_servers:
- host: 192.168.40.18
port: 20160
status_port: 20180
config:
server.labels: { host: "logic-host-1" }
- host: 192.168.40.18
port: 20161
status_port: 20181
config:
server.labels: { host: "logic-host-2" }
- host: 192.168.40.18
port: 20162
status_port: 20182
config:
server.labels: { host: "logic-host-3" }
monitoring_servers:
- host: 192.168.40.18
grafana_servers:
- host: 192.168.40.18
|
所有 IP 替换为实际服务器地址。3 个 TiKV 实例用不同端口区分,通过 labels 标记为独立逻辑节点,满足 PD 至少 3 副本的要求。
执行部署(输入服务器密码):
1
| tiup cluster deploy tidb-test v8.1.0 /data/install/topology.yaml --user root -p
|
启动集群:
1
2
3
| tiup cluster start tidb-test
# 这个命令更多是用于部署时初始化密码,对已运行集群效果不直接
tiup cluster init-password --cluster tidb-test --password '你的新密码'
|
查看集群状态:
1
| tiup cluster display tidb-test
|
5. 验证连接
1
2
3
4
5
6
7
| yum install mysql -y
# 或者
yum install mariadb-server -y
# 通过 MySQL 客户端连接 TiDB
mysql -h192.168.40.18 -P4000 -u root
# 有密码
mysql -h192.168.40.18 -P4000 -u root -p
|
6. 管理界面访问
部署完成后,可通过浏览器访问以下管理界面:
| 界面 |
地址 |
默认用户名 |
默认密码 |
| TiDB Dashboard |
http://<服务器IP>:2379/dashboard |
root |
数据库密码 |
| Prometheus |
http://<服务器IP>:9090 |
— |
— |
| Grafana |
http://<服务器IP>:3000 |
admin |
admin |
如果 TiDB 部署在远程服务器,建议通过 SSH 端口转发访问:
1
| ssh -L 2379:192.168.40.18:2379 -L 9090:192.168.40.18:9090 -L 3000:192.168.40.18:3000 root@<服务器IP>
|
然后在本地浏览器访问 http://192.168.40.18:2379/dashboard、http://192.168.40.18:9090、http://192.168.40.18:3000。
7. 配置开机自启(集群模式)
使用 TiUP 部署的集群默认已自动创建 systemd 服务,各组件会随系统启动:
1
2
3
4
| # 启用 TiDB 服务
systemctl enable tidb-4000
systemctl enable tikv-20160
systemctl enable pd-2379
|
常用 TiUP 命令
1
2
3
4
5
6
7
8
9
10
11
12
| # 查看集群列表
tiup cluster list
# 启动/停止集群
tiup cluster start tidb-test
tiup cluster stop tidb-test
# 重启集群
tiup cluster restart tidb-test
# 销毁集群
tiup cluster destroy tidb-test
|
新建数据库
1
2
| mysql -h192.168.40.18 -P4000 -u root
mysql -h192.168.40.18 -P4000 -u root -p
|
1
2
3
|
CREATE DATABASE lenglian;
CREATE DATABASE db_ccoms;
|
导入表结构
1
2
3
4
5
6
7
8
9
10
11
| use lenglian;
source /data/software/sql_init/lenglian.sql;
source /data/software/sql_init/base_setting.sql;
source /data/software/sql_init/insert.sql;
# 或者
mysql -h192.168.40.18 -P4000 -u root lenglian < /data/software/sql_init/lenglian.sql
mysql -h192.168.40.18 -P4000 -u root lenglian < /data/software/sql_init/base_setting.sql
mysql -h192.168.40.18 -P4000 -u root lenglian < /data/software/sql_init/insert.sql
use db_ccoms;
source /data/software/sql_init/db_ccoms.sql;
|
修改密码
1
2
3
4
5
|
ALTER USER 'root'@'%' IDENTIFIED BY '你的新密码';
FLUSH PRIVILEGES;
|
BR 备份与恢复
BR(Backup & Restore)是 TiDB 官方提供的物理备份恢复工具,基于 SST 文件进行备份,速度快、支持增量备份。BR 通过 TiUP 安装,支持本地目录和 S3/兼容存储作为备份目标。
1. 安装 BR
版本信息:
2. 全量备份
备份整个集群到本地目录:
1
2
3
4
5
| tiup br backup full \
--pd "192.168.40.18:2379" \
--storage "local:///data/backup/tidb-full" \
--ratelimit 128 \
--log-file backup-full.log
|
备份单个数据库:
1
2
3
4
5
| tiup br backup db \
--pd "192.168.40.18:2379" \
--db "lenglian" \
--storage "local:///data/backup/tidb-lenglian" \
--log-file backup-lenglian.log
|
备份到 S3 兼容存储(如 MinIO):
1
2
3
4
5
6
7
8
| tiup br backup full \
--pd "192.168.40.18:2379" \
--storage "s3://backup-bucket/tidb-full" \
--send-credentials-to-tikv=true \
--s3.endpoint "http://192.168.40.18:9000" \
--s3.access-key "minioadmin" \
--s3.secret-key "minioadmin-secret" \
--log-file backup-full-s3.log
|
3. 增量备份
先做一次全量备份,之后可基于上次备份的 snapshot 做增量:
1
2
3
4
5
6
7
| # 获取上次全量备份的 snapshot(从日志中查看,如 2026-05-21 10:00:00)
# 然后用 --lastbackupts 指定增量起点
tiup br backup full \
--pd "192.168.40.18:2379" \
--storage "local:///data/backup/tidb-incremental" \
--lastbackupts "2026-05-21 10:00:00" \
--log-file backup-incremental.log
|
4. 查看备份元信息
1
2
3
| tiup br validate decode \
--field="start-version" \
--storage "local:///data/backup/tidb-full"
|
5. 全量恢复
恢复整个集群:
1
2
3
4
5
| tiup br restore full \
--pd "192.168.40.18:2379" \
--storage "local:///data/backup/tidb-full" \
--ratelimit 128 \
--log-file restore-full.log
|
恢复单个数据库(TiDB v5.0+):
1
2
3
4
5
| tiup br restore db \
--pd "192.168.40.18:2379" \
--db "lenglian" \
--storage "local:///data/backup/tidb-lenglian" \
--log-file restore-lenglian.log
|
从 S3 恢复:
1
2
3
4
5
6
7
8
| tiup br restore full \
--pd "192.168.40.18:2379" \
--storage "s3://backup-bucket/tidb-full" \
--send-credentials-to-tikv=true \
--s3.endpoint "http://192.168.40.18:9000" \
--s3.access-key "minioadmin" \
--s3.secret-key "minioadmin-secret" \
--log-file restore-full-s3.log
|
6. 恢复时过滤 / 表映射
按表恢复:
1
2
3
4
5
6
| tiup br restore table \
--pd "192.168.40.18:2379" \
--db "lenglian" \
--table "sys_user" \
--storage "local:///data/backup/tidb-lenglian" \
--log-file restore-table.log
|
恢复时重命名表 / 库(--filter 配合 --rules):
1
2
3
4
5
6
7
8
| # 将备份中的 lenglian 库恢复为 lenglian_bak 库
tiup br restore db \
--pd "192.168.40.18:2379" \
--db "lenglian" \
--storage "local:///data/backup/tidb-lenglian" \
--filter "lenglian.*" \
--rules "lenglian.*:lenglian_bak.*" \
--log-file restore-remap.log
|
7. 定时备份脚本示例
1
2
| mkdir -p /data/scripts
vi /data/scripts/tidb-backup.sh
|
1
2
3
4
5
6
7
8
9
10
11
12
13
14
15
16
17
18
19
| #!/bin/bash
BACKUP_DIR="/data/backup/tidb-full"
DATE=$(date +%Y%m%d_%H%M%S)
LOG="/data/backup/backup-${DATE}.log"
# 创建按日期命名的子目录
mkdir -p "${BACKUP_DIR}/${DATE}"
# 执行全量备份
tiup br backup full \
--pd "192.168.40.18:2379" \
--storage "local://${BACKUP_DIR}/${DATE}" \
--ratelimit 128 \
--log-file "${LOG}"
# 保留最近 7 天的备份,删除更早的
find "${BACKUP_DIR}" -maxdepth 1 -type d -mtime +7 -exec rm -rf {} \;
echo "[$(date)] Backup ${DATE} completed" >> /data/backup/backup-history.log
|
赋予执行权限并加入 crontab 每日凌晨 2 点执行:
1
2
| chmod +x /data/scripts/tidb-backup.sh
crontab -e
|
添加:
1
| 0 2 * * * /data/scripts/tidb-backup.sh >> /data/backup/cron-backup.log 2>&1
|
8. 常见问题
| 问题 |
解决 |
storage permission denied |
确保 TiKV 进程有权限读写备份目录,使用 chown 或放在 /data/backup 等目录 |
GC life time is shorter than transaction duration |
备份前调整 GC:mysql -h192.168.40.18 -P4000 -u root -e "UPDATE mysql.tidb SET VARIABLE_VALUE='72h' WHERE VARIABLE_NAME='tikv_gc_life_time';" |
| 备份/恢复速度慢 |
提高 --ratelimit 值(单位 MB/s),确保磁盘 IO 充足 |
| 增量备份找不到上次 snapshot |
使用 br validate decode 查看备份元数据,确认 start-version |
注意:BR 是物理备份工具,恢复时会覆盖目标库已有数据。生产环境建议定期备份到独立的存储设备或 S3 兼容存储,并定期检查备份的可用性(在测试环境做一次恢复验证)。
四、安装 Nginx
1. 在线安装 Nginx
启用并启动:
1
2
3
4
5
| systemctl enable nginx
systemctl start nginx
systemctl stop nginx
systemctl restart nginx
systemctl status nginx
|
五、验证所有服务
安装完成后,检查所有服务状态:
1
2
3
4
5
6
7
8
9
10
11
12
| # 检查 Java
java -version
# 检查 TongWeb
systemctl status tongweb
# 检查 TiDB
tiup cluster display tidb-test
# 检查 Nginx
systemctl status nginx
nginx -t
|
查看各服务端口:
1
| netstat -tlnp | grep -E '(80|443|9060|18080|4000)'
|
| 服务 |
默认端口 |
说明 |
| Nginx |
80 |
HTTP 服务 |
| TongWeb 管理 |
9060 |
管理控制台 |
| TongWeb 应用 |
18080 |
应用访问端口 |
| TiDB |
4000 |
分布式 HTAP 数据库(MySQL 协议兼容) |
| TiDB Dashboard |
2379 |
PD 管理接口 / Dashboard |
| Prometheus |
9090 |
监控数据查询 |
| Grafana |
3000 |
可视化监控面板 |